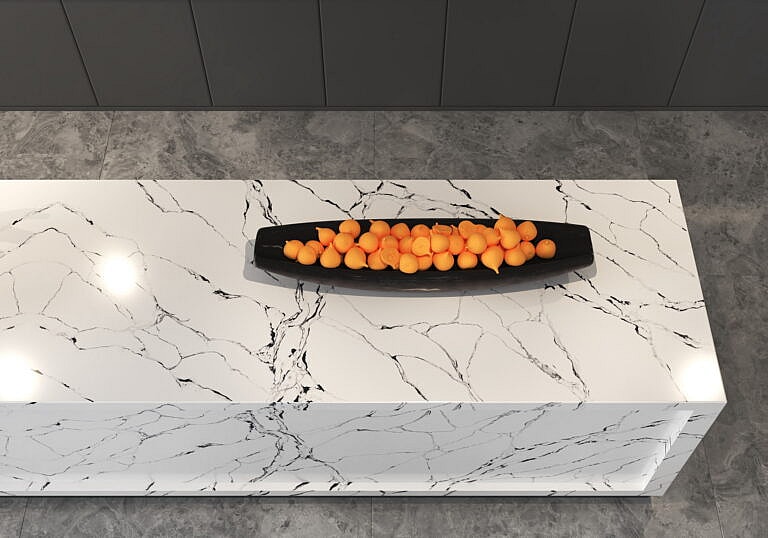
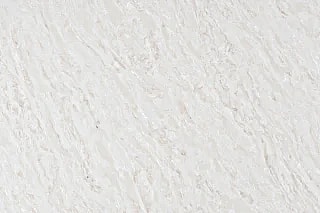
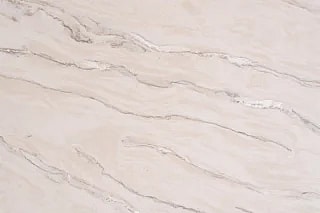
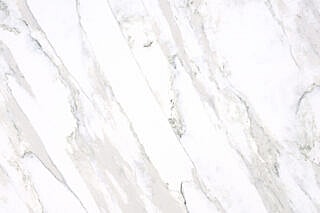
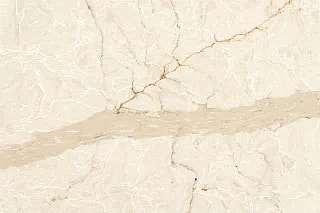
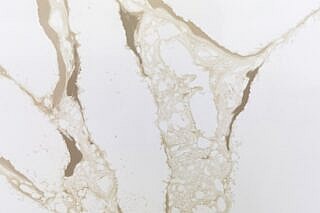
Quartz slabs with consistent veining for purposes of alignment aesthetics;
Circular saw;
Level to make sure that the surface is even during the installation process;
Adhesive – usually high-quality silicone or another expensive specially formulated for quartz;
Caulking/sealant gun;
Clamps;
Safety equipment – gloves, goggles, mask.
The Installation Process
To make the process of installing Calacatta quartz flawless, developers follow these steps:
Measuring and templating: The first step is to measure the space in which quartz is being installed. For templating, professionals use the most precise digital technology available today to make sure everything fits perfectly;
Cutting the slab: The next step is to cut the slab into required pieces. They need to be precisely the size as on the template, which later can be checked with the level rail;
Dry fit: Before gluing a slab on the cabinet, it is necessary to “dry fit” in , meaning that the entire slab is put on the surface in one to make sure it fits and veining looks pleasant on cabinets.
Glueing: Before the slab is placed on the countertops, it is important to spread a sufficient amount of adhesive using a caulking gun. Professionals need to make sure that as much of the surface is covered with glue and no air pockets have formed.
Placing slab: After surface and slab has been glued, it is time to put the slab on the cabinets. The professionals use clamps to make sure the slab is firmly installed.
Making it levels: Professionals use the level checker to make sure everything looks perfect. If it does not, they may do the correction before the glue is still not dry yet.
Applying sealer or finishing: Finally, when the slabs have their place, professionals use a sealer to cover the small holes between them. This prevents water from going inside and mould from developing, and the edges of the quartz buys be finished with a special machine to polish its appearance.
Calacatta Quartz Maintenance
Calacatta quartz, similarly to other quartz types, requires frequent cleaning by using a non-abrasive cleaner and avoiding prolonged exposure to direct sunlight, which can result in ultraviolet light discoloration. In addition, spills, especially those caused by acidic substances, such as lemon, lime, vinegar, and tomato sauce, must be cleaned immediately so that they do not cause etching.
To ensure the smooth, successful, and appropriate installation of Calcutta quartz countertops, the installation space itself must be correctly and properly prepped. In this sense, proper preparation means that the environment is correctly prepped to guarantee the longevity and stability of the installation.
Space Should be Clear
Space preparation, first of all, involves removing all appliances and items from the existing countertop and cutting the workspace . All devices, sinks, proper fixtures, movable items, must be disconnected and removed to ensure no restrictions at the workspace.
Chack the Cabinets
Then, it is recommended to check the cabinetry in place where the quartz countertop will sit. It is vital that they sit level and sturdy . To check the appropriate configurating level the cabinet with a tool like a carpenter’s level. If a systematic error is identified, there might need adjustments. Additionally, the cabinet should not be in any way mobile, so move them both direction to test them and, based on the assessed parameters, reinforcement may be necessary.
Clean and Dust-Free Installation Area
Before installing the quartz, the area should be properly and diligently cleaned to be free of debris, dust, and other potential contaminants that may impede the appliance of the curing agents by the specialists. This is crucial because some dust might mix with the curing agent and weaken the bond.
Protecting the Flooring
Considering the weight of the materials and the materials themselves, protecting the flooring needs to be prioritized. Therefore, it is highly advised to cover the working space with old plywood, clothes, or special lose sheets.
Setup All Tools
Finally, it is advised to organize all tools and materials beforehand to streamline and maximize the work process .
Transporting and Handling Quartz
For the proper transport and handling of Calcutta quartz slabs, several requirements should be met before installation. While quartz is durable, it is a very delicate form in which to maneuver a slab and includes safety coatings as it can easily break. To ensure that the slabs are not damaged during the installation, it is necessary to follow specific requirements.
Transportation Protocol
During transportation from the factory to the site, the quartz is loaded onto the back of a specially modified vehicle. Given the vulnerability of the material, transport is carried out exclusively in a partly vertical, tightly on the back and without unnecessary vibrations due to a special shock-absorbent padding . In addition, such vehicles are equipped with a viable vertical rack system.
Handling the Slabs
After arriving at the site, be careful when unloading. Precisely two professionals get off the slab from the truck. No sudden movements or boosts are needed, it is better to put the slab on the side, open the protective corners, and move the slab with gripping devices suitable for handling of stone, most commonly suction cup lifters.
Inspection Requirements
The slab should not be relocated to the site without inspection. The inspection must be performed as soon as the slab is removed. Please, leave problems on the act, as slave flaws must be established to check whether these slabs meet the installation requirements. Do not put a slave with a split into the installation site without counting its consequences.
Passing the Apartment
It is also advisable to take care not when lowering the slabs to the installation site in the apartment. Now measure all the doorways, the size of the stairs, and all passages so that the slab does not hang out dangerously in transport. Remove the lintel, which protrudes from the wing, and generally disappears.
Before Installation
In the installation zone, be careful after the slab enters. Make sure the surface in the fitting area is clean, in any case, you should not put the slab on the concrete at this stage – put a whole piece on a flat plywood or bubble wrap.
Template Creation and Quartz Cutting
To install Calcutta quartz countertops properly, it is important to create an accurate template and cut the quartz accurately. This stage requires utmost attention to detail to ensure the final product fits perfectly and looks stunning.
Template Creation
The first step is creating an accurate template of the installation area. Professionals usually use a durable material such as corrugated plastic or stiff cardboard for templating. Measure twice, cut once is the golden rule here. Professionals account for all relevant features such as sinks, faucets, appliances, etc. in the template. The slab is cut in such a manner that it accommodates all these fixtures.
Transferring the Template
The template is moved to the quartz slab, and the exact measurements and cut lines are transferred. To avoid that the template moves during the marking process, it must be properly secured. Non-permanent markers that are designed to be used on the stone are used for marking.
Cutting the Quartz
Cutting the slab is the most difficult stage of the installation. A specialized diamond blade saw is used for cutting, and the slab is usually mounted on the water-cooled cutting table. The process minimizes dust production, but the main benefit is that the water cools the blade, preventing the quartz from overheating and damaging it. Each cut must be controlled and accurate, so cutting is a slow process with steady movements. The cuts must follow the marked lines as closely as possible.
Edge Polishing
Once the main cuts are made, the edge polishing is performed. It is a critical stage because polished edges are not only aesthetically pleasing but also smooth to touch. Professionals use an array of polishing pads with progressively finer grains to finish the edges, making the quartz just as shiny as the top.
Final Inspection
Before the pieces are transported to the installation site, the team performs the final inspection. They check for any minor imperfections or deviations from the template. If everything is OK, the quartz is approved for installing.
Installation Process
The installation of Calcutta quartz countertops is a critical process because it determines the functional stability and visual appeal of the furnishing element. Consequently, each concrete step of the process is depicted below to ensure a perfect finish of the quartz that meets the planning and corresponds to the interior design.
Surface preparation
Before installing the quartz, it is required to prepare the base cabinets so that they could hold the weight of the stone. The issue with pacing the cabinets is that the surfaces should be leveled and affixed so that they would not move in the future. Furthermore, the areas where the cabinets would be placed should be devoid of all dust and dry to guarantee the strength of the quartz’s binding.
To have a lasting installation, the selection of adhesive is essential. Professionals typically use silicone-based adhesive because it is strong and flexible. It is required to smoothly run a bead of adhesive along the top edges of the cabinets to make sure there would not be any missed spaces. Otherwise, the slab might hang and sit incorrectly on several spots because of the bad quality of adhesive distribution.
Placing the quartz
The first step at this point is to put the slab of quartz onto the adhesive-covered cabinets. It is crucial to ensure that it is precisely where it has been planned. The second step is to apply delicate but lasting pressure along the whole length of the stone to make sure it is fixed to the adhesive.
Seam joining
The final step of the installation that is required only in cases when multiple pieces of quartz have been used. The seams in between the pieces should be filled sections of epoxy or resin of the color-matching the quartz. The adhesive should be precisely and adequately applied along the edges. Furthermore, the pieces should be help together with clamps. It is essential to stress that after the installation, some time for the adhesive and epoxy to cure should be given. It is approximately 24 hours. During this time, the countertops should be kept from pressure or application. The final last step is to clean the whole quartz area with a soft, nonabrasive cleaner.
PANMIN is an innovative manufacturer of artificial quartz slabs. PANMINQUARTZ® is man-made quartz surfaces from PANMIN, which can be applied in residential and commercial interior decoration including kitchen countertops, bathroom vanities and office table.
Currently, we have three factories, two in China and one in Cambodia to provide sufficient services to our customers.
For more information about PANMIN, please refer to our contact page and we should get back to you ASAP.
PANMIN returned to the 139th Canton Fair for the third time, presenting a comprehensive range of engineered and natural stone surfaces. This year’s exhibition highlighted not only material diversity but also end-to-end fabrication capabilities, demonstrating PANMIN’s role as a full-solution stone supplier for global projects. From quartz surfaces and silica free surfaces to granite, porcelain […]
We sincerely invite you to visit PANMIN at the 139th Canton Fair in Guangzhou. As a long-standing supplier serving the global stone market, PANMIN will be present at the China Import and Export Fair Complex from April 23 to April 27, 2026. Exhibition Details• Date: April 23–27, 2026• Venue: China Import and Export Fair Complex, […]
As 2025 comes to a close, PANMIN concluded its exhibition journey at IndoBuildTech Expo 2025, marking both our debut in Indonesia and the grand finale of this year’s global showcase. This debut represents an important step toward connecting PANMIN’s craftsmanship and modern design with Southeast Asia’s growing appreciation for natural-inspired, sustainable materials. Embracing Indonesia’s Design […]
At the 138th Canton Fair, PANMIN showcased the perfect blend of cutting-edge technology and timeless craftsmanship, presenting an extensive range of materials designed to meet the evolving demands of modern interiors. From quartz and silica free surfaces to granite and porcelain surfaces, PANMIN demonstrated how innovation, aesthetics, and functionality come together to create spaces that […]
We are pleased to invite you to IndoBuildTech 2025, taking place November 6–9, 2025 at ICE BSD City, Indonesia. As one of the most influential architecture and design events in Indonesia and Southeast Asia, the show brings together global experts, designers, and leading brands to explore cutting-edge materials and sustainable solutions. PANMIN will present a […]
As autumn arrives with golden hues and festive joy, the National Day and Mid-Autumn Festival are just around the corner. On this special occasion, PANMIN extends our warmest greetings to you and your family. Holiday Schedule To allow our team to celebrate and spend time with loved ones, PANMIN will be closed from October 1st […]
We use cookies to ensure that we give you the best experience on our website. If you continue to use this site we will assume that you are happy with it.